Spring and Summer are for planting things in the garden, right? Well if that’s true, then I’m right on schedule.
A while back, the Internet circulated a little how-to for making self-watering seed sprouting containers out of plastic bottles and that article got served up in one of my gardening tips feeds on Pinterest. Now my seed starting experiences have always resulted in pathetic looking little sprouts that can’t hold up a few teeny leaves, much less make a vegetable fit for eating. So I decided to try out these “fabulous” self-watering containers and see if they would work better for me.
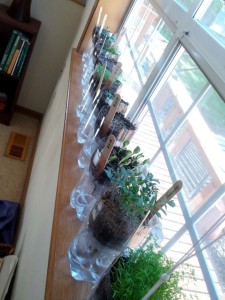
My husband regularly goes through two liter bottles, so I started saving them up for this project. I already have cotton yarn on hand for knitting dishcloths, so no material acquisition was necessary. Following the directions: I cut the bottles in half, punched a hole in the cap, threaded the yarn through the cap, filled the top half with seed starter and seeds, and filled the bottom half with water. Et voila! A gardening project I don’t have to think about. Easy peasy.
 The seeds not only sprouted stout and healthy, they sprouted quickly. So I made more containers and planted more seeds. And then I got busy making more raised planters for my little backyard garden, to have somewhere for those little seedlings to grow up into yummy veggies.
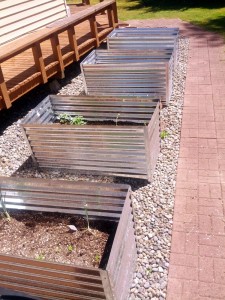
These raised planters are my own interpretation of the corrugated metal water troughs that some folks are buying to use as planters. The water troughs are a bit out of my budget. I wanted some money left over to buy plants for the front yard. I wandered through the hardware store, getting ideas for materials and how they could be assembled, and came up with this.
 These are made from corrugated steel roofing panels, cut to size with a pair of tin snips. The corner angles are preformed metal roof flashing, also cut to size with the tin snips. I drilled holes in both parts to prep for fastening them together. Then I used a pop rivet tool to rivet the two metal parts together, going around the sides to make a rectangular box with the top and bottom open.
My garden already had an area where the previous owners had laid down landscape cloth with a bed of rocks on top. I just pulled back the rock layer to clear a space large enough for the metal box to sit on the landscape cloth, then pushed the rocks back up against the outside of the box to stabilize it.
I had a pile of short tree limbs and shrub trimmings from earlier cleanup of the existing trees and shrubs in the yard, plus a healthy pile of grass clippings. These went into the bottom of the metal planter in layers until it was about halfway full. This will help keep too much rain from accumulating around the roots of the veggies. Then I mixed in bags of compost and potting soil on top of that to make the planting layer.
I tested out one of the planters last summer and discovered that it keeps the plants a bit warmer than they would be otherwise (given our mild summer days), and that it deters the animals from eating my veggies. So I made three more this year to finish out the vegetable portion of the garden.
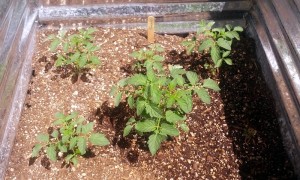
 The little seed sprouts were transplanted into the planter boxes once they were big enough. Summer came about a month early this year, so the cherry tomatoes are really going strong!
Last fall I planted a row of strawberries in a mostly sunny spot against the back of the house. I was surprised that the wild rabbits who came every afternoon to graze in the yard left them alone.
 This summer they are back and twice as big already. And still, no wild animals have claimed them for a salad bar. The bees are back to pollinate though. Win!
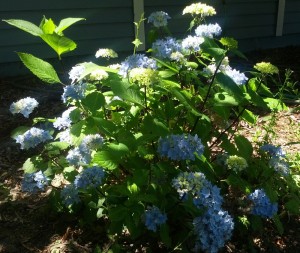
I also planted a one-gallon hydrangea in the mostly shady corner of the front bed at the end of the summer last year. I discovered that the soil is terrible there – sandy and rocky – under the thin layer of mulch. So I piled up a layer of homemade compost around it and watered as needed to get it through the dry season. (The rain doesn’t typically start back up until October here.) After the rain started I left it alone. I didn’t even deadhead the few blooms it put out, and it was looking very pitiful over the winter.
The hydrangea was still looking scraggly this spring. I considered pruning it a little, but stopped myself. Hands off, Lady!  Especially as I want my permanent garden residents to be as self-sufficient as possible. That appears to have been a good policy. The shrub is fully leafed out now, has doubled in size, and is covered in beautiful blooms.
 I love that our naturally acidic soil means that I don’t have to do anything to get them to bloom a gorgeous blue color. I’m considering adding a few more in the far corner of the backyard, where they will be in the dappled shade of the apple tree. We have plans to build a frame for the swing my grandfather made me and place it there. It will be nice to swing in the shade with those lovely blooms as a backdrop.
Husband says I have a brown thumb. What do you think?
