The story of the cabled sweater continues! (Get the first installment here.)
No, I didn’t succumb to a nap and I didn’t run out of steam. Zippy energy remained and I continued to ride the wave for as long as it would hold out.
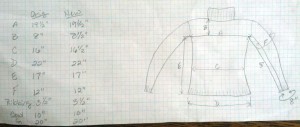
Materials still in hand, with the addition of the swatches and sketches, I proceeded to get the critical dimensions of the original sweater and of myself. Of course, I already had my critical dimensions (with respect to sweaters), but it never hurts to verify occasionally. The loss of 10 lbs since last summer has resulted in the equivalent loss in inches and half-inches here and there. All of this is important to the fit of the final garment.
Making a few notes of adjustments that would need to be made between the original sweater and the new version, I worked out the calculations for the stitch counts and sweater measurements at hem, waist, bust, upper arm, wrist, torso length, and sleeve length.
 I started sketching and making notes. I noted the stitch pattern, stitch count, and fabric length for the hem. Then added the collection of stitch patterns, repeats, and stitch counts for the cabled body. Finally I worked out the quantity of decreases to the waist, then increases again to the bust.
It was all falling into place. I quickly ran out of room on my graph paper. Then my pencil couldn’t draw the stitch patterns fast enough. I switched to a computerized spreadsheet, creating the grid, drawing the initial stitches, then copying and pasting with abandon. I’m a visual person, so it helped to be able to see all of the stitches laid out – not just a small section of them – to see where the individual elements interacted with each other. This cable flows into the shaping for the sleeve opening. That one falls at just the right place to give relief at the bust line without adding bulk or needing bust darts. Those cables flow into the scoop of the neckline.
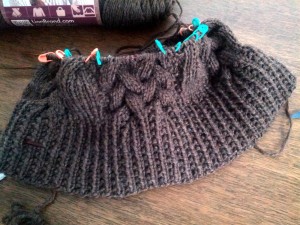
Once I was satisfied that the design was headed in a good direction, though it was by no means complete, I pulled yarn from the stash and cast on at the hem. I had purchased an affordable sturdy workhorse wool in a nice dark brown with the intention of using it for the test knit on this sweater. If it comes even close to being wearable in the end, that will be a bonus. However, I fully expect to make at least a few mistakes that I will want to correct in the second, and hopefully final, knitted version. Yes, I’m going into this knowing that I’ll knit it twice.
I put on a movie and settled in for a good long knit. The modified ribbing at the hem practically knit itself, and before I knew it I was moving on to the heavily textured body of the sweater. A quick measurement check showed the hem dimension was right on target.
 Several movies, TV shows, podcasts, and hours of knitting later I was nearing the separation at the underarm for the sleeve opening. I was forced to stop and tackle this next design problem: how to work the decreases for the set-in sleeve. This was a stumbling block that needed heavy research before I felt confident enough to continue.
Would this be the end of the cabled sweater project? Did I have the mental fortitude to figure out how to proceed? Or would the fabric be cast aside in favor of a medicine induced nap and a less mentally taxing knit? Stay tuned to find out!
