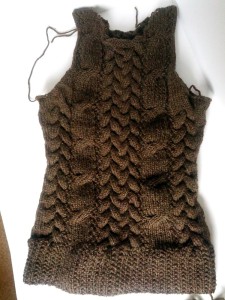
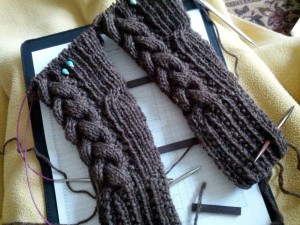
Continuing the story of the cabled sweater! Get the first two installments here and here.
Naps continued to be elusive and the medicine head never surfaced, though my nose frustratingly continued to run over.
I took up my design materials once again to tackle the problem of how to decrease for the armholes while artfully handling the flow of the cables around the seam of the sleeve join. I made the long, arduous trek down the hall to my personal knitting library. A little research was needed. I carried a stack of books from the library back to my room to settle in for some good sleuthing. Some smart person has already figured out the solution to the armhole shaping problem and written it down. The proof is in all of those lovely sweaters containing set-in sleeves that have been knitted for centuries. I just needed to find it.
And I did find it. Or rather, several versions of it. This designer has allowed for a fuller arm opening, that designer made hers slightly more fitted, and a third one offered yet another option. Which is frustrating, to say the least. Isn’t there a standard way to shape the opening?
But wait! Allowing for the gauge of the stitches in the reference patterns, I could see a sort of standard method emerging. All of them start with binding off a certain number of inches at the underarm, then decreasing evenly up the arm opening for a number of inches, and working straight up to the shoulder for a number of inches from the underarm. Okay, that’s a great place to start!
I converted all of those “inches” here and there into stitches and continued the chart in my spreadsheet. (Hey, it looks like an armhole! And it resembles the armhole shaping in the original sweater! This might actually work!) Then I added some shaping at the front and back necklines. The collar will be picked up and worked into a tube for the cowl neck, but the neckline at the sweater body still needs a bit of shaping so it will go over the head.
 While I was on a roll and the research for the set-in sleeves was still fresh, I tackled the sleeve design. I started a fresh chart for the sleeves and figured out the stitch count at cast on. Next came the decision for how frequently to increase the sleeve diameter and when to stop for the shaping at the sleeve cap. The sleeve cap also presented a new design challenge – it’s not simply a reverse of the sleeve shaping in the sweater body. And of course all of those cables have to be considered.
Here again, research yielded a clue for the number of inches bound off at the underarm, then the inches decreased, and inches of rows knit up from the underarm. I artfully planned for the ending of the cables, then sat back to survey the chart. The sleeve cap looked much too short for the opening it would need to fit. However, it looked very much like the one on the original sweater. I would just have to trust the research and rework the sleeve caps if they proved to be the wrong size once knitted up.
Once again, I queued up a stack of movies and settled in for a good long knit.
 Would the sleeve caps and armhole shaping marry perfectly? Would I need to rip out my hard work and try again? Would the sweater even fit? Stay tuned for the thrilling conclusion!
