Inspiration all Around

Every so often I get inspired to drop everything and make up something new.  As in, really make stuff up.  And you know I always have a few an overabundance of projects in progress.  I didn’t need to start anything else.  But the inspiration bug was overwhelming.  So I sat down to sketch and plot and plan.  When the Muse speaks, we must listen.  Right?

The design challenge this time is for a half-pi shawl with a Spring theme.  What is a half-pi, you ask?  A pi shawl is one that is knit in the round with regular increases based on the mathematical number pi so that the finished product is perfectly round.  A half-pi uses the same increase principle, but is only half of the circle and is knit back and forth in rows.  Typically, the diameter of a pi or half-pi shawl is equal to the wingspan (arms out, measured fingertip to fingertip across the shoulders) of the shawl’s owner.  To give you an idea of the amount of work involved with a project of this size: the last pi shawl I completed took 184 hours of knitting time.  Hopefully this one will be at least half that amount of time.

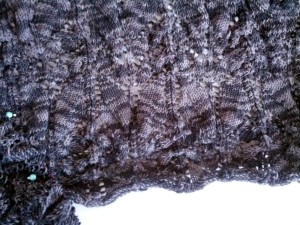
I visited my stitch dictionaries once again.  (These poor books are so well-loved, with little flag markers sticking out all over.  You’d think I would have them memorized by now.)  Spring starts with rain, so little raindrops went in the first section.  Then there are the first tentative buds poking their heads from the soil, so that went in the second section.  The third section represents the smaller flowers seen in early spring, and the fourth section represents the larger, more confident flowers seen in late spring.  The border is still a work-in progress, but is planned to represent the transition to summer.

I seem to be obsessed with seeing the patterns laid out as a whole so that I can visualize how the individual elements interact with each other before I cast on.  In this way I can see if an element needs to shift to one side a few stitches, or if I need to add or subtract ground stitches.  As knitters, we are used to seeing only a portion the overall pattern charted out – just enough to see one repeat of each individual stitch pattern.  This means that my spreadsheets are quite scary to most everyone else.  (I love a good, organized spreadsheet!)  That’s okay, I’ll just pare things down if I end up sharing the pattern with anyone else.

I chose a bright periwinkle blue laceweight yarn and got started knitting the first rows.  The beginning is a simple stockinette, with increases according to the pi shawl principles, until the stitch count is large enough to start the patterning in the first section.

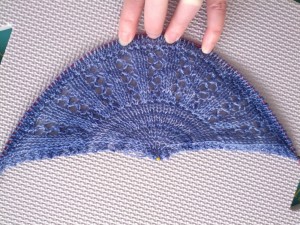
IMG_20150416_151532_smCan you see the rain running down the windows?

Posted in Knitting | Tagged , , , , , , , | Comments Off on Inspiration all Around

Revolving

My knitting/crochet mojo seems to have hit a particularly bad stretch of “sporadic activity.”  And “hopping around.”  And “never getting anything done.”  There are no finished works, just a large pile of works in progress (WIP) that never seem to actually…well, progress.

Here’s a look at what’s on the needles lately.

I dug the Lestrange Cardigan project out of the long-term storage WIP pile to knit on while on vacation.  It’s really the perfect weight to be wearing right now through to the beginning of July.  (The weather gods have determined that summer does not officially start in the Pacific Northwest until they see the Independence Day fireworks.)  I finished the upper body, and knit most of the sleeves while traveling (hooray for knitting them both at the same time!).  And then I stalled again because I needed to switch to the final version of the Knockoff Cable Sweater.  I just have the sleeve cap shaping and then miles and miles of lace borders to go!  Maybe I can sneak it in somewhere…

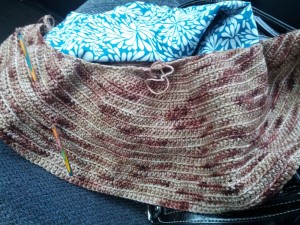
IMG_20140926_172002_clr_smLast month I had the itch to crochet a crescent shawl.  Don’t ask me why, it just overcame all rational thought and I needed to have one right then.  Cue the Ravelry pattern search, the stash dive, and many hours of happy crocheting.  And then the need passed, right about the time I got to the lace section and the pattern was getting interesting.  I think unless I can find a willing recipient for this, it just might stay in hibernation indefinitely.

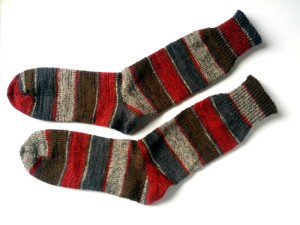
IMG_20150213_080424_smI sat down with Persnickety and knit a few pairs of socks.  Finally, we’re getting somewhere!  We happily cranked out a pair of boot socks for Husband, and a pair of boot socks for myself, then we hit a bit of a snag.  My hope was to crank a pair each week, for one or the other of us.  The reality is that when she drops half the sock after happily knitting the foot and turning the heel, I walk away and she goes in time out for a few days.  So it took a few weeks to get the next pair of socks.  And it’ll probably be a few weeks before the next pair is cranked out.  Which is still twice as fast as I can knit them myself by hand, and that’s if I don’t knit sweaters too.  She’s still pretty handy to have around.

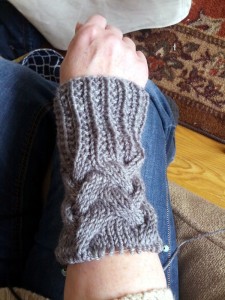
IMG_20150414_151655_clr_smOne of the Knit Girls decided she wanted to knit my Knockoff Cable Sweater (you know the one I wrote about here, here, here, and here) for herself out of the same yarn I’m using for my final version, but in a different colorway.  So I played around with the charts to size them for her dimensions and we both cast on a sleeve.  It turns out that even with my sporadic knitting schedule right now, it’s a quick knit and we both finished the sleeve at the same time.  Now on to the second sleeve.  If my friend wasn’t knitting with me, and we weren’t fixing charting discrepancies as we go (apparently I was half asleep when I updated the charts), I’d probably put it down.  This one isn’t for wearing until next winter; the Lestrange Cardigan would be higher on the to do list.

IMG_20150328_151227_clr_smIs this what Spring Fever is all about?  Tackling all the projects, all at once?

Posted in Knitting | Tagged , , , , , , , | Comments Off on Revolving

Cheerful Blues

There is so much activity going on around here, that the knitting has kind of taken a back seat.  Spinning is much more relaxing and less taxing on a sleepy brain.  I have been helping a friend out with refreshing the inside of her house – a lot of painting (ceilings are back-breaking!), learning to replace outlets (without electrocuting ourselves), and learning to replace baseboards (power tools!).  Needless to say, all of that physical activity is yielding several expected results: I’m happily exhausted by the time I get home, I have more energy, I’m learning new things (love this!), and I’m losing inches (if not pounds).  Her place is looking great, which makes both of us happy.

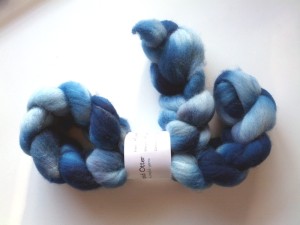
So I picked up the blue Masham – yet another sheep breed – fiber I had acquired last fall from a local indie dyer at Fiber Fusion Northwest and tried to determine how best to spin it.  My wool books list Masham wool on the scratchier end of the spectrum, and suggest it is best used for household items like rugs, weaving, pillow covers, etc.  My braid felt only slightly scratchier than the BFL I had just spun, so I decided I would spin it into a medium weight yarn and then knit it into a pillow cover.  The blues ran along the length from light to dark to light again, similar to the purple Merino I spun earlier, so I decided to spin it from end to end and chain ply it to further smooth out the finished yarn and preserve the color changes.

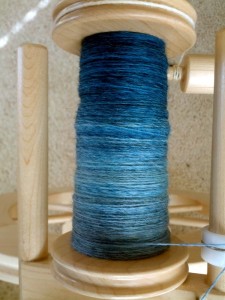
IMG_20141019_161604_clr_smThe singles just flew onto the bobbin.  It wasn’t that much different than spinning the BFL, in my experience.  My friends who have experience spinning Masham were telling a much different story.  Maybe my batch was processed differently?  Or theirs was from a particularly scratchy sheep?

IMG_20150304_140014_clr_smThe plying went really well too.  Once I get the first few chains going, things just fall into a rhythm – I’m just crocheting the yarn, making super long loops to form the chain.  This plying technique was a good choice for this yarn; the resulting yarn is smooth and even, with very little halo to prickle the skin.

While I was away on vacation visiting family, I helped Dad engineer and build a skein winder.  We even roped my son in on the math (yay algebra!).  This one is adjustable for skeins from 1 yard around to 2+ yards around, and can be completely broken down for storage.  So once the yarn was plied, I assembled the skein winder and tried it out.  Success!  This is so much easier than trying to wind it using a swift, which is typically used to unwind a skein.  The right tool for the job.  Thanks Dad!

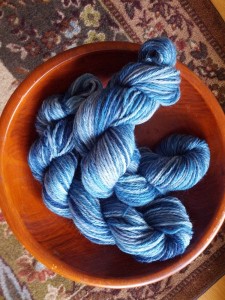
IMG_20150327_101023_clr_smAnd here is the finished yarn.  Isn’t it lovely?  It’s ~320 yards at a heavy worsted knitting weight.  The yarn is nice and round, and much softer than expected.  I can see some fabulous texture and cables in our future.

IMG_20150327_101225_sm

For the fiber folk:

Next up:  Some BFL in forest shades and learning a new spinning technique.

Posted in Spinning | Tagged , , , | Comments Off on Cheerful Blues

Catching Up

Yikes, it’s been a few weeks since I last posted.  You’d think I went on vacation.   Wait…I did!  And I’ve been playing catch up ever since.

Spring has been going full tilt here in the Pacific Northwest since the beginning of March.  Here are some pics of our flowery loveliness to keep you busy until I can pull together a more involved post.

fleur_clr_trmNote my non-brown thumb in action: these bulbs had been sitting in a bag in my garage for years before I finally decided to expend the energy to pot them up.  This is their second bloom.  Still haven’t managed to kill them with neglect.  Take that, Husband of Doubting!

IMG_20150304_142450_smThere’s a whole row of these blooming trees in the green space across the street.  I get to see this show every time I step outside.

IMG_20150324_124801_clrThe beautiful specimen in my friend’s back garden, with the evergreens all around as a backdrop.  Just lovely.

Got blooms?

Posted in Gardening | Tagged , | Comments Off on Catching Up

Sunny Days are for Exploring

Who says that it rains all the time in Seattle?  Hint: Seattleites do; it’s how we keep the rest of you from coming up here and crowding the place.

We’ve had a rare run of really gorgeous weather lately, so I decided to take advantage of it and go exploring.  Puget Sound is full of lovely islands with picturesque villages accessible by ferry.  I have a fondness for Whidbey Island, with its abundance of fiber producing farms.  To get there, I took a ferry from Mukilteo – which is really the focus of this post.  There is a good sized waterfront park with an historic working lighthouse near the ferry terminal at Mukilteo that gave me the best views that day.

IMG_20150303_092916_smAs the locals say, “the mountains were out,” including Mount Baker – one of the volcanoes to the north of the city, shown here in it’s glacier covered glory rising above the surrounding mountains.  It’s a happy day when we can see the nearby peaks.

IMG_20150303_093001_trm_smIt was warm enough to stand out on the deck of the ferry to snap some photos.  This lighthouse has two keeper’s houses – one for the Keeper and a separate one for the Assistant Keeper.

When I returned from my visit to the island, I was able to take a closer look.

IMG_20150303_113437_clr_smIMG_20150303_113413_clr_trm_smIMG_20150303_113552_clr_smIMG_20150303_114050_clr_smOut front at the gate to the grounds, there is a beautiful tree with brilliant red bark on the newer branches.  Very striking against the blue sky, don’t you think?

IMG_20150303_114432_clr_smIMG_20150303_114451_smNext time this park would be a perfect spot for a picnic.

Posted in Adventuring | Tagged , , , , | Comments Off on Sunny Days are for Exploring

Cloudy Days and Fancy Footwork

A few months ago I decided to acquire a new spinning wheel.  This was a big decision, because it’s not as simple as buying smaller tools like knitting needles.  Wheels are a major investment.  And…I was worried about the antique wheel gathering dust if I brought a shiny new wheel into the house.

I went to a local yarn shop that also sells spinning wheels and fiber so that I could try out a few options.  And really, I also went to see if my spinning woes were “user error” or a wheel/task misfit.  I discovered that Penelope (the antique wheel) is great for spinning big fluffy singles, but terrible at spinning finer singles.  The Lendrum Double Treadle Folding Wheel I tried out spun beautiful fine and midweight singles without any effort, and I fell in love.  Knowing that a good friend absolutely loves her Lendrum sealed the deal and I brought one home.

Since then I’ve been happily spinning away – during episodes of several TV series, football games, and (coming soon!) baseball games.  The singles flow on this wheel wonderfully, and the plied yarn is yummy and exactly as imagined.  So far, I think I’ve tried every speed setting.  I’ve even had to deliberately slow down my treadling at one point in order to get the result I wanted.  She’s just so speedy and smooth and graceful!  I think I’m naming her Josephine.

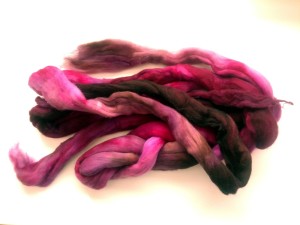
First up on the new wheel was a Malabrigo Nube roving dyed in shades of purple and magenta.  My goal was to end up with a fingering weight 3-ply yarn.

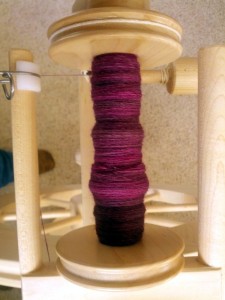
IMG_20141023_150030_clr_smDespite the pills and felted sections in the fiber supply (So frustrating; this is a commercial product!), I felt like I was getting a pretty consistent singles that matched the singles thickness in the commercial yarn I had deconstructed to use as a gauge example.

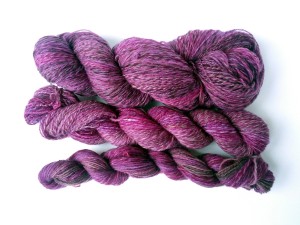
IMG_20141023_145916_clr_smThe finished yarn didn’t bloom quite as much as expected, so I ended up with a 3-ply lace weight yarn instead.  No wonder the spinning felt like it was taking forever!  The final count is ~600 yards at 18 wraps per inch between two skeins that I can use for a single project.  A third, smaller skein of ~130 yards was chain plied as an experiment to see how the different plying techniques changed the coloration in the yarn.  I think I should chain ply an entire project at some point, even though I find it a tad on the fussy side to execute.

IMG_20150218_110521_clr_smAfter spinning such a fine project, I felt like I needed to work on something on the thicker side.  I hear that other spinners have difficulty spinning thicker singles after getting used to spinning fine yarns, and I don’t want to fall into that pothole.  I visited the fiber stash for some inspiration.  (Of course there is a fiber stash!  You didn’t think I’d be unprepared, did you?)  There are several examples of lovely fiber goodness there, but I decided to spin in the order of acquisition so that nothing sits around in the stash too long.

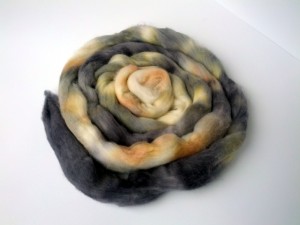
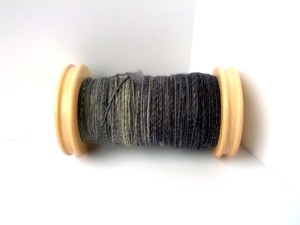
Next up then was an indie-dyed braid of Merino in tones of grey.  Kind of like the cloudy Seattle sky in winter.  Just my thing.  This time I tried to go about it even more logically.  Not just thinking about gauge, but color progression in the singles and the finished yarn.  I unraveled the braid and laid the roving out on the floor to see how the colors moved along the fiber – mixed or separate, long or short, random or patterned, etc.  It appeared that the dyer had painted the two halves of the length at the same time, with each color moving into the next.  I decided to break the roving at the halfway point.  The plan was to spin a 2-ply aiming for DK weight, and reverse the color direction between the two singles.

IMG_20150218_110238_clr_smI absolutely love the way the color progressed along these singles!  The yarn started at a white with a smidge of grey, gradually became a dark charcoal grey, then lightened back to almost white again.  I was so fascinated with the color changes that I spun the entire first bobbin in one evening.  I just couldn’t stop!

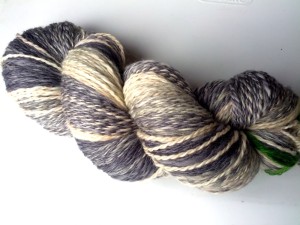
IMG_20150218_110131_clr_smOnce the first bobbin was finished and I saw how the color changes were working, I decided to spin the second bobbin in the same color direction rather than reversing the color direction.  Reversing the color direction would have hopefully matched up a lighter color with a darker color when the singles were plied together, resulting in more of a barber pole effect.  Working the color in the same direction would hopefully match up the color progressions more exactly, resulting in more of a “grey scale” look to the finished yarn.  Fingers crossed (figuratively), I spun the second bobbin then plied the two singles together.
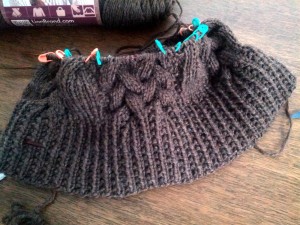
IMG_20150222_142638_clr_smThe result is a fluffy, soft DK weight yarn with ~400 yards at 11 wraps per inch.  The colors marry quite nicely in places and barber pole in others, so I actually ended up with both options.  Happy accident!  It’s really a result of my spinning inexperience – the two bobbins were not spun exactly the same, so the lengths of each color were different between the two singles.  This is what makes handspun wonderful.

For the Spinners/Knitters:

  • Fiber: 100% Merino by Malabrigo Nube, colorway #136 Sabiduria
  • Ravelry handspun project page here
  • Fiber: 100% Merino by Shadawyn Fiber Arts, colorway Moonlit Garden #3
  • Ravelry handspun project page here

What’s next?  A lovely braid of Masham wool hand dyed in cheery blues.

IMG_20141019_161604_clr_sm

Posted in Spinning | Tagged , , | Comments Off on Cloudy Days and Fancy Footwork

The Long (Sleeved) Sprint to the End

Finally, the conclusion of the cabled sweater story!  Get the first three installments here, here, and here.

Why is it that knitting the sleeves seems to take absolutely forever?  After all they’re just a fraction of the knitting, compared to the body of the sweater.  I can understand them taking a long time if they’re boring – who wants to go round and round and round when they’re ready to wear the sweater already?  But these sleeves have cables, and ribs, and textured stitches.  There should be plenty to hold the attention of the knitter!

Apparently not.  Around the time that the sleeves reached the elbows, my nose began to return to normal and I tentatively ventured back out into the world.  My mind wandered to the next project.  My hands were reluctant to pick up the sleeves and knit a round or three.  The knitting excitement that had knocked out a heavily cabled sweater body in under a week was nowhere to be found, and these sleeves were coming up on a week on the needles.

IMG_20150202_154153_clr_smBy Friday of the second week of the sweater, I was disgusted with my lack of forward progress on the sleeves.  There were only a few inches to go before the sleeve caps.  Just get it done already!  So I resolved to sit down with my knitting and not put it down until it was finished.  Which turned out to be just the thing.

Those last few inches flew by and before I knew it I was shaping the sleeve caps.  Zoom!  And they were off the needles.  Time for the moment of truth; would the sleeve caps fit the arm openings?

I began to pin the sleeves to the sweater body.  Holding my breath, willing the stitches to work with me.  And…it worked!  The sleeves fit perfectly into the arm openings!  I was giddy with relief.  That was the scariest part of the whole project.  I danced around the house with glee.  But I wasn’t finished yet.

With the sleeves sewn into the body, I picked up stitches around the neck opening and proceeded to knit the cowl neck.  This was easy knitting after the stress of fitting the sleeves and body together.  (I note that the cowl is also just a tube, yet it knits up ten times faster than a sleeve.  What gives?)

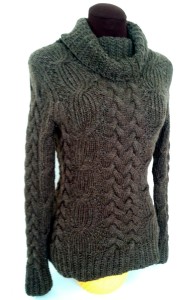
IMG_20150215_135439_clr_smOnce all of the knitting was finished, I went to the mirror to try it on.  Once again, I held my breath.

And…it fits!  Not perfectly, but it’s definitely wearable.  I’ve decided to add a few stitches to the circumference of each sleeve and to the sweater body of the final version to make it more comfortable.  This adjustment is not necessary, but it would make me feel better.

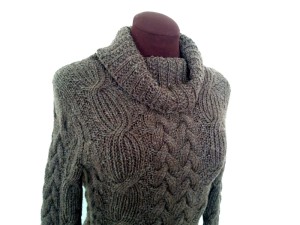
The yarn relaxed and softened, as expected, after a nice soapy bath.  This sweater will be a warm, classic wardrobe addition.  And look at how flattering it is to the body.  I’m absolutely thrilled with the results!
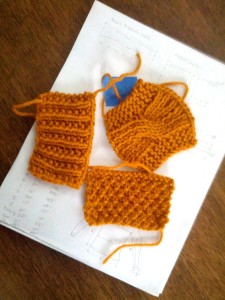
IMG_20150215_135422_clr_trm_smNow to write up the pattern, find the perfect soft grey yarn, and do it all over again.

Posted in Knitting | Tagged , , , , , | Comments Off on The Long (Sleeved) Sprint to the End

Armholes, Sleeve Caps, and Cables – Oh my!

Continuing the story of the cabled sweater!  Get the first two installments here and here.

Naps continued to be elusive and the medicine head never surfaced, though my nose frustratingly continued to run over.

I took up my design materials once again to tackle the problem of how to decrease for the armholes while artfully handling the flow of the cables around the seam of the sleeve join.  I made the long, arduous trek down the hall to my personal knitting library.  A little research was needed.  I carried a stack of books from the library back to my room to settle in for some good sleuthing.  Some smart person has already figured out the solution to the armhole shaping problem and written it down.  The proof is in all of those lovely sweaters containing set-in sleeves that have been knitted for centuries.  I just needed to find it.

And I did find it.  Or rather, several versions of it.  This designer has allowed for a fuller arm opening, that designer made hers slightly more fitted, and a third one offered yet another option.  Which is frustrating, to say the least.  Isn’t there a standard way to shape the opening?

But wait!  Allowing for the gauge of the stitches in the reference patterns, I could see a sort of standard method emerging.  All of them start with binding off a certain number of inches at the underarm, then decreasing evenly up the arm opening for a number of inches, and working straight up to the shoulder for a number of inches from the underarm.  Okay, that’s a great place to start!

I converted all of those “inches” here and there into stitches and continued the chart in my spreadsheet.  (Hey, it looks like an armhole!  And it resembles the armhole shaping in the original sweater!  This might actually work!)  Then I added some shaping at the front and back necklines.  The collar will be picked up and worked into a tube for the cowl neck, but the neckline at the sweater body still needs a bit of shaping so it will go over the head.

IMG_20150203_150145_clr_smWhile I was on a roll and the research for the set-in sleeves was still fresh, I tackled the sleeve design.  I started a fresh chart for the sleeves and figured out the stitch count at cast on.  Next came the decision for how frequently to increase the sleeve diameter and when to stop for the shaping at the sleeve cap.  The sleeve cap also presented a new design challenge – it’s not simply a reverse of the sleeve shaping in the sweater body.  And of course all of those cables have to be considered.

Here again, research yielded a clue for the number of inches bound off at the underarm, then the inches decreased, and inches of rows knit up from the underarm.  I artfully planned for the ending of the cables, then sat back to survey the chart.  The sleeve cap looked much too short for the opening it would need to fit.  However, it looked very much like the one on the original sweater.  I would just have to trust the research and rework the sleeve caps if they proved to be the wrong size once knitted up.

Once again, I queued up a stack of movies and settled in for a good long knit.

IMG_20150202_154153_clr_smWould the sleeve caps and armhole shaping marry perfectly?  Would I need to rip out my hard work and try again?  Would the sweater even fit?  Stay tuned for the thrilling conclusion!

Posted in Knitting | Tagged , , , , , | Comments Off on Armholes, Sleeve Caps, and Cables – Oh my!

A Cabled Puzzle

The story of the cabled sweater continues!  (Get the first installment here.)

No, I didn’t succumb to a nap and I didn’t run out of steam.  Zippy energy remained and I continued to ride the wave for as long as it would hold out.

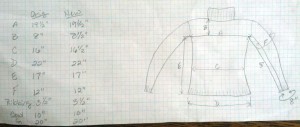
Materials still in hand, with the addition of the swatches and sketches, I proceeded to get the critical dimensions of the original sweater and of myself.  Of course, I already had my critical dimensions (with respect to sweaters), but it never hurts to verify occasionally.  The loss of 10 lbs since last summer has resulted in the equivalent loss in inches and half-inches here and there.  All of this is important to the fit of the final garment.

Making a few notes of adjustments that would need to be made between the original sweater and the new version, I worked out the calculations for the stitch counts and sweater measurements at hem, waist, bust, upper arm, wrist, torso length, and sleeve length.

IMG_20150203_150248_clr_trm_smI started sketching and making notes.  I noted the stitch pattern, stitch count, and fabric length for the hem.  Then added the collection of stitch patterns, repeats, and stitch counts for the cabled body.  Finally I worked out the quantity of decreases to the waist, then increases again to the bust.

It was all falling into place.  I quickly ran out of room on my graph paper.  Then my pencil couldn’t draw the stitch patterns fast enough.  I switched to a computerized spreadsheet, creating the grid, drawing the initial stitches, then copying and pasting with abandon.  I’m a visual person, so it helped to be able to see all of the stitches laid out – not just a small section of them – to see where the individual elements interacted with each other.  This cable flows into the shaping for the sleeve opening.  That one falls at just the right place to give relief at the bust line without adding bulk or needing bust darts.  Those cables flow into the scoop of the neckline.

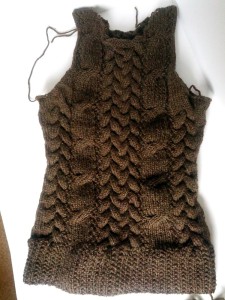
Once I was satisfied that the design was headed in a good direction, though it was by no means complete, I pulled yarn from the stash and cast on at the hem.  I had purchased an affordable sturdy workhorse wool in a nice dark brown with the intention of using it for the test knit on this sweater.  If it comes even close to being wearable in the end, that will be a bonus.  However, I fully expect to make at least a few mistakes that I will want to correct in the second, and hopefully final, knitted version.  Yes, I’m going into this knowing that I’ll knit it twice.

I put on a movie and settled in for a good long knit.  The modified ribbing at the hem practically knit itself, and before I knew it I was moving on to the heavily textured body of the sweater.  A quick measurement check showed the hem dimension was right on target.

IMG_20150127_154221_clr_smSeveral movies, TV shows, podcasts, and hours of knitting later I was nearing the separation at the underarm for the sleeve opening.  I was forced to stop and tackle this next design problem: how to work the decreases for the set-in sleeve.  This was a stumbling block that needed heavy research before I felt confident enough to continue.

Would this be the end of the cabled sweater project?  Did I have the mental fortitude to figure out how to proceed?  Or would the fabric be cast aside in favor of a medicine induced nap and a less mentally taxing knit?  Stay tuned to find out!

Posted in Knitting | Tagged , , , , , , | Comments Off on A Cabled Puzzle

Decoding Cables

Shortly after the holidays, I ran across one of the many cold bugs that folks have been passing around for the last month.  I bravely powered through it only to run into another one.  And another.  And another.  None of them really knocked me over, though each successive sniffle broke down another layer of defense.  Last weekend, after a really lovely date night out with Husband (some good food, a rock opera, and a few drinks), I finally succumbed to a nasty cold.  My nose runneth over, to put it mildly, and I resigned myself to spending several pajama days in bed, fortified with cold medication.

Now a word about the effects of cold medication on my unique bodily system.  That warning on the side of the package telling parents that some children may react to the medication with hyperactivity?  That message is for me.  My 41 year old body reacts as if I were still 6.  Bouncy is an understatement.  Zippy may be more appropriate.  At least for the first few doses.

Knowing that I would have at least a few days of enhanced energy levels, but that I couldn’t go out into the world, I gave myself a new project.  I had just finished a cozy sweater and was riding high on that success.  I felt ready for a new challenge; one that would capitalize on my hyperactivity and solitary confinement.  A puzzle that needed several hours of concentrated effort to decipher.

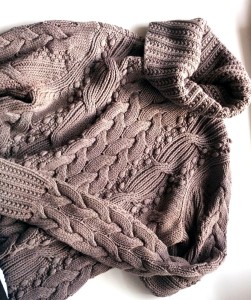
Remember when I told you about my favorite cozy sweater?  The one that I’ve had for at least 10 years, that is so worn well loved that the dye is fading from the wear points?  The one with the fabulous cables and perfect fit that earn rave reviews each time I wear it?

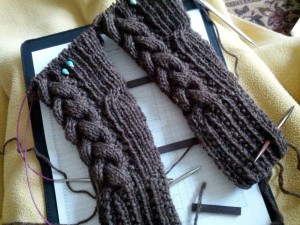
IMG_20141023_145325_clr_trm_smYep, that one.  My family will recognize it as the sweater I wore in every family photo for several successive holidays.  It’s a classic.  That’s the sweater project I chose to tackle in my medicated state.  Most sane people would settle in with a stack of good books and a movie or two.  Not me.  Maybe it was the fever?

I reasoned that I had finally knit enough sweaters of varying construction to tackle the basic shape.  I reasoned that I had the knitterly experience to figure out the various stitches that make up the overall pattern – there are four stitch patterns in there, ignoring the bobbles (I abhor bobbles).  I reasoned that my personal library contained enough reference material to help me answer any questions that arose (and if not, there’s always the Internet).  I reasoned that I would not encounter the perfect storm of focus, time, and solitude again anytime soon.  I would spend these hours productively.

I don’t know how it happened.  Maybe it was the right project at the right time.  I’ve been wanting to do this for years, but I was scared of the complexity and my relative lack of experience.  Those other designers have been doing this much longer than myself.  But somehow my designer brain and my technical brain decided to work together on this project.  I drew on the years of architectural and technical design experience working on projects where I didn’t have a clue what I was doing, but was trying it anyway.  I won’t say it is easy – it requires real concentration and the right frame of mind – but it sure is fun!

I gathered my materials: the original sweater, yarn in the appropriate weight, needles, graph paper, pencil, measuring tape.  Starting with the easiest stitch pattern to decipher – easy wins are best for building momentum – I sketched out the stitches and knit up a quick swatch.  Then I moved on to the next easiest stitch pattern, repeating the effort for each one and working toward the most puzzling.  With each “win” I felt more confident.

The final puzzle was the intricate looking, but super flexible, ribbed cable.  This one is magic.  This one required some real thought and a few passes through the swatch before I could confidently sketch out the stitch pattern in chart form.  How to maintain the rib pattern during the cable crossing?  Once I had that figured out, I danced through the house.  I was on a roll!

IMG_20150127_154139_clr_smNow I had all of the elements in hand.  Now for the real brain work.  The next task was to put those elements together – in the correct stitch count, increasing here, decreasing there – so that the finished item would both resemble my beloved original sweater and fit beautifully.

Did I stay on task?  Or did I succumb to medicine head and the lure of a good nap?  Stay tuned to find out!

Posted in Knitting | Tagged , , , , , , , | Comments Off on Decoding Cables